Creating Dynamic Network Objects
Dynamic network objects track the state of hosts and create host groups with common behavior on the fly (see also Network Segmentation). Rules add hosts to dynamic network objects. Hosts that belong to a dynamic network object are removed from them by rules or by timeout.
Dynamic network objects can be global (available for all rules) or defined and used within a correlation scenario.
The following example shows how to create a global dynamic network object for test clients in the network.
Navigate to Policy > Network Objects.
Open the Dynamic Network Objects tab.
Click Add Global Dynamic Network Object to create a new dynamic network object.
Enter general information for the object:
Enter a Name, e.g.
All Test Clients.Optional: Enter a Note to describe the object.
Specify the Settings of the dynamic network object:
Under Network, select Internal.
Tip
The Internal and External networks are basically superordinate network objects, i.e. they contain the network objects assigned to them. They can be used as traffic source and destination in rules like other network objects. The Internal network refers to the part of the network that Threat Defender can see, while the External network is the part that is not monitored by Threat Defender.
Specify the maximum Size of the object list (e.g.
100entries).Set a Timeout after which the entries will be removed automatically (e.g. 60s x 60 x 24 x 7 =
604800seconds = 1 week).
Optional: If there are hosts you want to include in the list right away, enter their IP addresses under Forced Includes. These entries will be handled as any other host on the list. They will be removed by timeout or by a rule with the delete action for dynamic network objects. You can also explicitly exclude IP and/or MAC addresses from the dynamic network object.
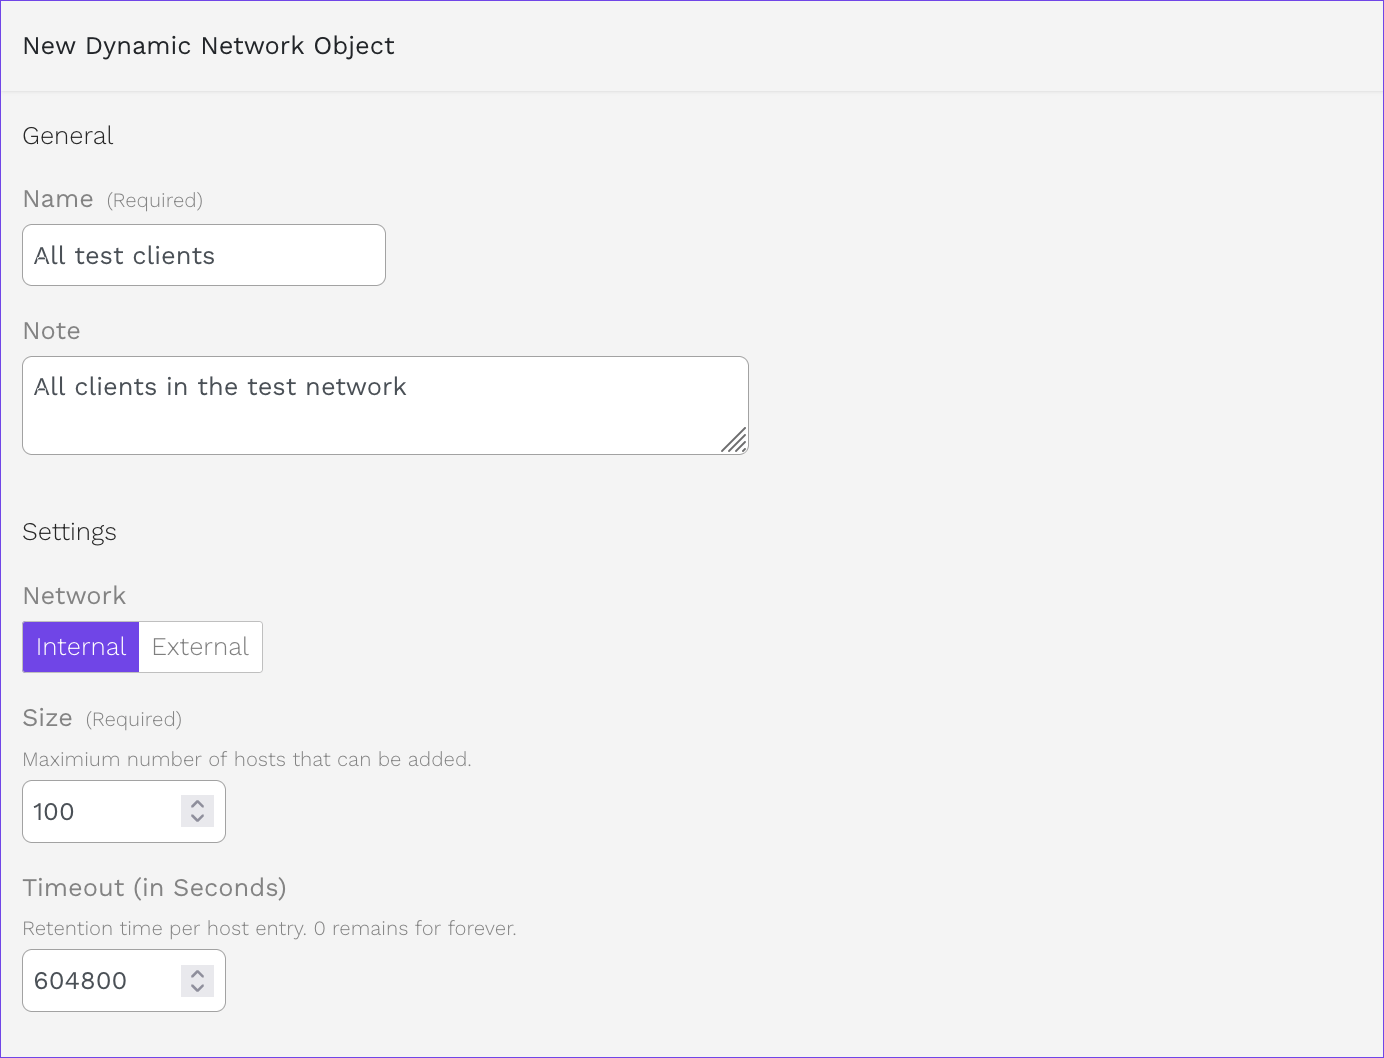
Example dynamic network object for test clients.
Click SAVE to store the new global dynamic network object.
Click the APPLY CHANGES button at the top of the menu bar to activate your configuration changes.
Additional References:
For further information on the settings options, see Dynamic Network Objects.